Enamel paints have been the dominant choice for scale modellers since the hobby began. Humbrol's small tins are practically synonymous with British model-making, and for good reason: enamels produce a hard, durable finish, flow beautifully from a brush, and can be thinned and blended with considerable control. Understanding how they actually work — and how they differ from acrylic and lacquer paints — means you can use them to their full potential rather than fighting their characteristics.
What Are Enamel Model Paints?
Enamel paints are oil-based paints that use a synthetic resin as the binder and mineral spirits (white spirit) or proprietary thinners as the carrier solvent. The oil base is what gives enamels their distinctive working characteristics: a longer open time than acrylics (meaning the paint stays workable for longer after application), excellent self-levelling (brush strokes tend to fade as the paint dries), and a hard, tough finished surface.
The term "enamel" in modelling refers specifically to these oil-based, spirit-thinned paints — it's distinct from the ceramic enamel used on bathtubs, and also distinct from lacquer paints despite some superficial similarities.
Enamel paints are available in a wide range of finishes — gloss, satin, and matt — and the finish type is determined by the amount of flattening agent in the formula rather than the paint chemistry itself. Gloss enamels have essentially no flattening agent. Matt enamels have significant amounts. Satin sits between the two.
Enamel vs Acrylic vs Lacquer: Which Should You Use?
The three main paint types in scale modelling each have distinct strengths. Understanding them helps you choose the right tool for each part of a build rather than trying to make one paint type do everything.
| Property | Enamel | Acrylic | Lacquer |
|---|---|---|---|
| Thinner | White spirit / enamel thinner | Water / acrylic thinner | Lacquer thinner (aggressive) |
| Drying time | Slow (4–24 hours) | Fast (30 min–1 hour) | Very fast (15–30 min) |
| Durability | Very hard finish | Slightly softer | Hardest finish |
| Brush painting | Excellent — self-levels well | Good, needs thinning | Difficult — dries too fast |
| Airbrushing | Good — needs more thinning | Excellent | Excellent |
| Washes/filters | Ideal — can be removed with white spirit without affecting enamel basecoat | Not ideal — can reactivate lower layers | Works but fumes are strong |
| Clean-up | White spirit required | Water (when wet) | Dedicated thinner required |
| Odour | Moderate (solvent) | Minimal | Strong (highly flammable) |
| Plastic safety | Safe when dry | Safe | Can attack polystyrene if applied heavily |
The practical takeaway for most modellers: use acrylics for the main colour coats (fast drying, easy clean-up), then use enamel washes and filters over a sealed acrylic base. This combination gives you the best of both — acrylic's speed for base colours, enamel's excellent wash behaviour for weathering and shading.
The Best Enamel Paint Brands for Scale Modelling
Humbrol — The British Standard
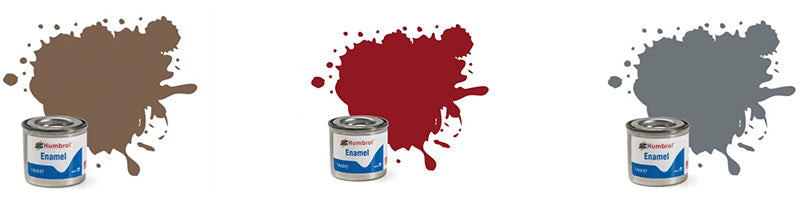
Humbrol is the brand most British modellers grew up with, and it remains excellent. Their numbered colour system (No.1 through to well beyond 200) has been consistent for decades, meaning colour references in old kit instructions still apply to current tins. Humbrol enamels brush paint extremely well — good coverage, smooth levelling, solid opacity in two coats. Their 14ml tins are the industry standard size.
Humbrol Enamel Matt colours are particularly suited to military modelling — authentic military colours with excellent coverage and very convincing matt finish when dry. Their metallic range (chrome silver, gun metal, gold) is also genuinely good and handles well over a black undercoat.
Revell — Excellent Colour Range
Revell Enamel paints come in larger 14ml pots and cover a range of finishes — gloss, silk (satin), and matt. Their colour range is particularly strong for aviation and naval subjects, matching many Luftwaffe and Royal Navy specification colours accurately. Revell enamels thin well with standard white spirit and behave predictably. Their colour 90 (antracite) and 78 (carmine red) are perennial favourites for detail painting.
Tamiya — Best for Airbrushing
Tamiya's enamel range (the X- and XF- numbered colours) behaves somewhat differently to Humbrol and Revell — thinner out of the tin and designed with airbrushing in mind. They also work excellently as brush-applied detail paints and washes, thinned with Tamiya X-20 Enamel Thinner. Tamiya XF-1 (Flat Black) and XF-2 (Flat White) are particularly useful as tonal modifiers added to any colour to darken or lighten without affecting the enamel chemistry.
Thinning Enamel Paints
Enamel paints straight from the tin are typically too thick for optimal application, particularly for airbrushing. The general guidance:
- Brush painting: Thin to the consistency of full-fat milk. Start with the paint as it comes from the tin and add thinner a drop at a time until the consistency is right. With Humbrol, this is often 10–15% thinner added to the paint.
- Airbrushing: Thin to the consistency of skimmed milk or watercolour — approximately 1:1 paint to thinner for most enamel paints, sometimes up to 2:1 thinner for fine detail work with reduced needle size.
- Washes: Thin heavily — approximately 1 part paint to 5–10 parts thinner for panel line washes, or even more dilute for general filters.
Which Thinner to Use
The safest option is the manufacturer's dedicated thinner — Humbrol Enamel Thinner, Revell Color Mix, or Tamiya X-20 Enamel Thinner. These are formulated specifically for their paints and won't adversely affect the binder. Standard white spirit (mineral spirits) also works well for Humbrol and Revell, and is considerably cheaper. Avoid turpentine — it dries slowly and can affect finish quality.
For panel line washes specifically, many modellers use Zippo lighter fluid (naphtha) as the thinner for enamel washes, as it dries quickly and can be cleaned up with white spirit without affecting enamel basecoats or sealed acrylic layers underneath.
Brush Painting with Enamels
Enamel paints are genuinely forgiving for brush painting — arguably more so than acrylics because their longer open time allows brush marks to self-level as the paint dries. The technique that produces the best results:
- Stir thoroughly before use. Don't shake — stirring keeps air bubbles out. Pigment settles over time, particularly in metallic and matt colours. Stir until completely uniform.
- Use a good brush. A synthetic flat or round brush with a good point holds paint well and releases it evenly. Sizes 2–4 for large areas, 0–00 for detail work.
- Thin slightly before applying. Even for brush painting, a small amount of thinner improves flow dramatically.
- Two thin coats over one thick one. Apply a thin coat, allow to touch-dry (approximately 2 hours for standard enamels), then apply a second thin coat. This produces better coverage and avoids runs, tide marks, and obliterated detail.
- Work quickly and don't overwork. Unlike acrylics, enamel stays workable for longer — but if you keep brushing over partially dried paint, you'll pick up what's already laid down. Apply each stroke once and leave it.
Airbrushing with Enamel Paints
Enamels work well through an airbrush, though they require more thinning than acrylics. Key points:
- Thin to a very fluid consistency — approximately 1:1 or more thinner. The paint should flow like watercolour.
- Apply multiple light passes rather than one heavy coat to avoid runs and pooling.
- Clean the airbrush thoroughly with enamel thinner immediately after use — enamel that dries in the airbrush is significantly harder to remove than acrylic.
- For small 0.2–0.3mm needles, thin more aggressively — enamels' heavier pigment particles can clog finer nozzles if insufficiently thinned.
If you're considering an airbrush, browse our airbrush kits — we stock a range from beginner dual-action gravity-feed brushes through to professional compressor setups.
Enamel Washes and Filters
One of the most powerful uses of enamel paints in scale modelling is as panel line washes and colour filters applied over a sealed acrylic or lacquer basecoat. The technique works because enamel thinner (white spirit) does not reactivate a dried acrylic paint layer — so you can apply an enamel wash, allow it to dry partially, and then wipe off the excess with white spirit on a flat brush, leaving the wash only in recesses and panel lines.
This creates immediate, realistic depth and shading. A dark brown or black enamel wash on an olive drab tank, or a dark grey wash on a natural metal aircraft, transforms a flat-painted model into something that looks genuinely weathered. Humbrol No.33 (Black), No.98 (Chocolate), and No.62 (Leather) are classic panel line wash colours used heavily in armour modelling.
Drying Times
Enamel paints are significantly slower to dry than acrylics. As a general guide:
- Touch dry: 1–4 hours depending on thickness, temperature, and humidity.
- Hard dry (safe to handle): 12–24 hours.
- Full cure: 3–7 days. Fully cured enamel is much harder and more resistant to scratches and chemicals than a surface that's only touch-dry.
- Between coats: Wait at least 4 hours, preferably overnight in cold conditions.
Cold and high humidity significantly extend drying times. Warm, dry conditions help. Avoid painting in temperatures below 10°C — the paint may not cure correctly.
Primer Compatibility
Enamel paints are compatible with most primers, including:
- Lacquer-based primer (Tamiya Surface Primer, Mr Surfacer) — fully compatible; allows enamel over the top with no issues once the lacquer primer is fully dry.
- Enamel primer — fully compatible; enamel over enamel is chemically consistent.
- Acrylic primer — generally compatible, but allow the acrylic primer to cure fully (24 hours ideally) before applying enamel over the top. Wet enamel's solvent can partially reactivate fresh acrylic if applied too soon.
- Rattle-can aerosol primer (Halfords, Duplicolor) — fully compatible once dry. Commonly used as a base under enamel paints for large areas.
One compatibility note: do NOT apply lacquer paints over enamel. Lacquer solvents are aggressive enough to wrinkle and lift dried enamel. The safe stacking order is: primer → enamel base colours → gloss coat → enamel washes → gloss coat → decals → gloss coat → enamel filters → matt varnish.
Health and Safety
Enamel paints and their thinners contain solvents that produce fumes. Good practice:
- Ventilate your workspace. Open a window and direct fresh air across your working area. Solvent fumes are heavier than air and accumulate at bench level.
- Use a respirator for airbrushing. A half-face respirator with organic vapour cartridges (3M 6000 series or equivalent) is the proper solution when airbrushing enamels. A paper dust mask does not filter solvent vapours.
- Dispose of solvent-soaked materials carefully. Rags and tissue soaked in enamel thinner should be left to dry flat outside before disposal — never bundle and throw in a bin, as spontaneous combustion is a remote but real risk with oil-soaked materials.
- Keep away from children and pets. Enamel thinners are harmful if swallowed and should be stored securely.
- Wash hands after use. Prolonged skin contact with enamel thinners is a skin irritant. Use barrier cream or nitrile gloves if you're spending extended periods handling thinned enamel paint.
Frequently Asked Questions About Enamel Model Paints
Can I use enamel paints directly on bare plastic?
Yes, enamel paints are safe on polystyrene plastic once you apply them correctly — they won't attack the plastic the way lacquer solvents can. However, you should always prime first. Bare polystyrene doesn't give paint much to grip; primer creates a proper mechanical bond, improving adhesion and preventing chipping.
What can I use to thin Humbrol enamel paints?
Humbrol Enamel Thinner is the dedicated product and works perfectly. Standard white spirit (the same type used to clean oil paint brushes in art) also works well and is much cheaper — buy odourless white spirit if you're bothered by the smell. Avoid turpentine, which dries slowly and affects the finish. For washes, Zippo lighter fluid (naphtha) is an excellent fast-drying alternative.
How do I fix brush strokes in dried enamel paint?
Light brush strokes in enamel often self-level as the paint dries — wait and see before intervening. Stubborn strokes can be carefully sanded back with 800–1000 grit wet-and-dry paper once fully cured (24+ hours), then a fresh thin coat applied. Alternatively, enamel thinner applied with a brush can soften and reblend the surface if the paint is only partially cured. For airbrushed finishes, light strokes in the enamel coat can be buffed out with a soft cloth once fully cured.
Can I paint acrylic over enamel?
Yes — acrylic over fully cured enamel is fine. Acrylic solvents (water and mild co-solvents) don't reactivate dried enamel. This is a common approach: enamel base coat, then acrylic detail colours for precision brushwork. Allow the enamel to cure fully (24 hours minimum) before applying acrylics over the top.
Why is my enamel paint still tacky after 24 hours?
Usually one of three causes: the paint was applied too thickly (thick coats skin over on the surface but remain soft underneath — the solution is thin coats); the workspace is cold or very humid (enamel cures best above 15°C and below 75% humidity); or the paint has been contaminated with too much thinner (over-thinning can prevent proper curing). If paint remains tacky after 48 hours at room temperature, it's unlikely to cure correctly and may need to be removed and the surface repainted.
Shop Enamel Paints at Access Models
We stock Humbrol, Revell, and Tamiya enamels alongside a full range of acrylic model paints and airbrush equipment. For advice on choosing between paint types, read our guide to choosing model paints, or our scale model guide for paint recommendations by kit type.
Shop enamel and acrylic paints at Access Models — full range, fast UK delivery.